Halloween Cake Pops
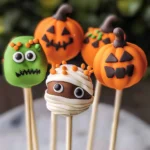
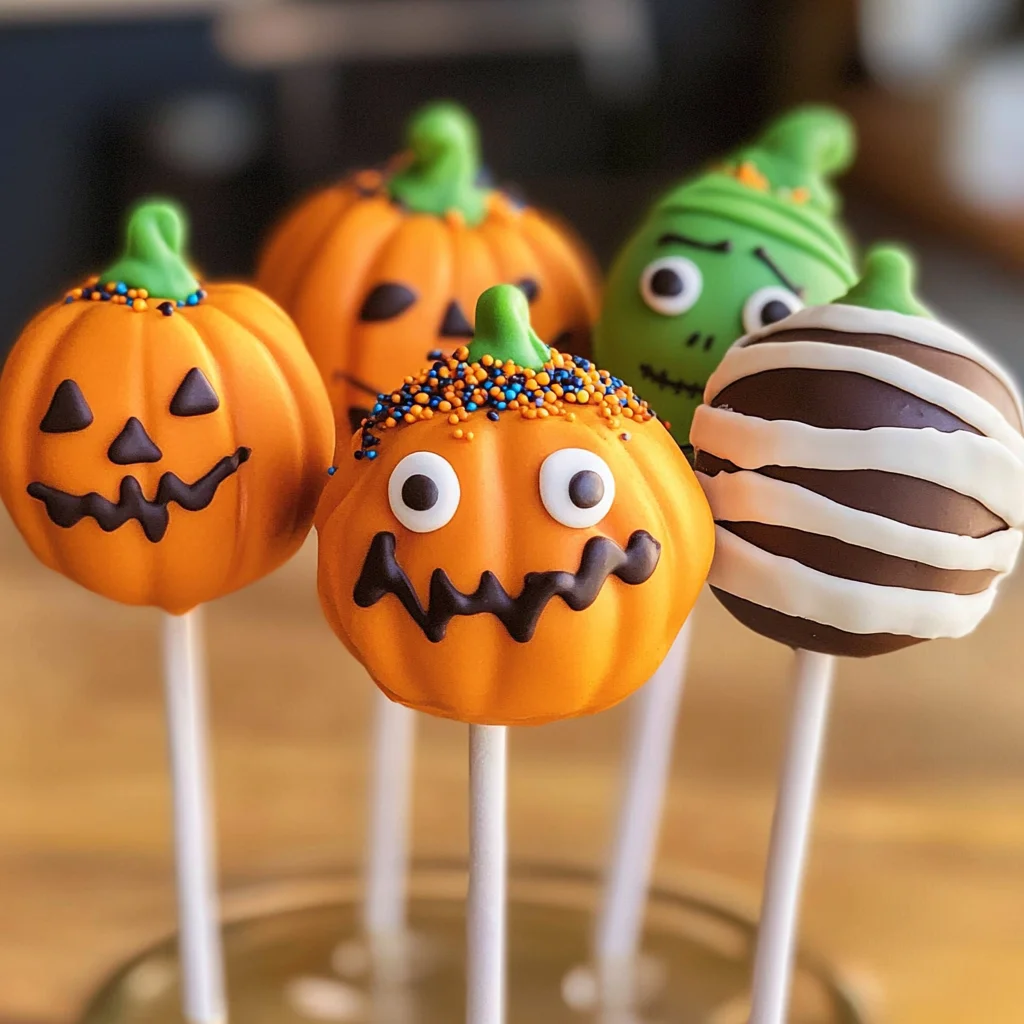
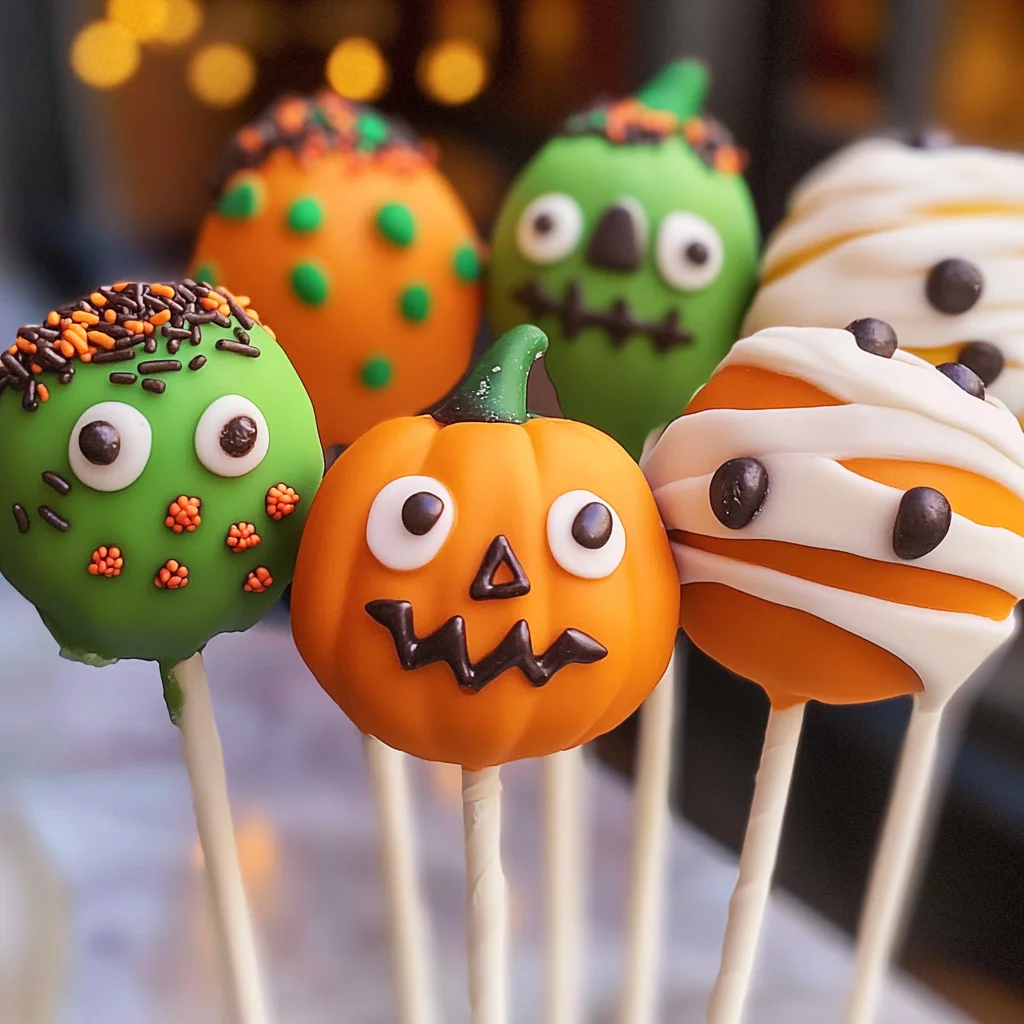
Add these spooky Halloween Cake Pops to your next Halloween party for a fun and festive treat. These delightful bite-sized pieces of cake can be decorated as pumpkins, Frankensteins, or mummies, making them perfect for kids and adults alike. With their rich flavor and creative designs, they are sure to impress your guests at any gathering.
Why You’ll Love This Recipe
- Easily Customizable: You can decorate these cake pops in countless ways, allowing for creativity and personal touches.
- Perfect for Parties: These treats are ideal for Halloween parties or gatherings, guaranteed to be a crowd-pleaser.
- Fun Activity for Kids: Making cake pops is an enjoyable activity that kids can help with, making it a great family project.
- Delicious Flavor: Choose between chocolate or vanilla cake base combined with creamy frosting for a rich taste.
- Portable Treats: Cake pops are easy to handle and perfect for taking on the go during Halloween festivities.
Tools and Preparation
Before you start making your delicious Halloween Cake Pops, gather all the necessary tools. Having everything ready will make the process smooth and enjoyable.
Essential Tools and Equipment
- Mixing bowls
- Electric mixer
- Baking pan (13 x 9)
- Refrigerator
- Microwave-safe bowl
- Mini lollipop sticks
Importance of Each Tool
- Electric mixer: This tool makes mixing the batter easy and ensures a uniform consistency.
- Baking pan: A good quality baking pan helps achieve even baking results for your cake.
- Refrigerator: Chilling the cake balls is essential for them to hold their shape while decorating.
Ingredients
For these spooky Halloween Cake Pops, you will need the following ingredients:
- 1 box Favorite cake mix
- 1 3.4 oz box instant pudding mix
- 4 eggs
- 1 cup water
- 1/3 cup vegetable oil
- 1 cup Frosting
- Candy Melts
- Toppings – sprinkles, candy eyes
How to Make Halloween Cake Pops
Step 1: Preheat the Oven
Preheat your oven to 350°F. Spray your 13 x 9 pan with vegetable pan spray to prevent sticking.
Step 2: Prepare the Cake Mixture
In a large bowl, combine:
1. Favorite cake mix
2. Instant pudding mix
3. Eggs
4. Water
5. Vegetable oil
Beat at medium speed for about 2 minutes until well combined. Pour into the lightly greased cake pan.
Step 3: Bake the Cake
Bake in the preheated oven for 30-40 minutes. Check if it’s done by inserting a toothpick into the center; it should come out clean. Once baked, cool in the pan for about 10 minutes.
Step 4: Crumble the Cake
Once cooled, use your hands to crumble the cake in a large bowl until no large chunks remain. You can also use two forks to make this easier.
Step 5: Add Frosting
Add one cup of frosting to the crumbled cake mixture. Mix using your fingers until well combined.
Step 6: Form Into Balls
Form small balls from the mixture, creating evenly sized cake pops.
Step 7: Chill Cake Balls
Chill these formed balls in the refrigerator for at least two hours so they harden properly.
Step 8: Melt Candy Melts
Melt Candy Melts in a microwave-safe bowl using short intervals of about 30 seconds at half power until fully melted.
Step 9: Insert Sticks
Dip one end of each mini lollipop stick into melted Candy Melts and then insert into each chilled cake ball. Let them set; you can speed up this process by placing them in the freezer for about 20 minutes.
Step 10: Dip in Candy Melts
Wait until the candy coating is completely firm before dipping each pop fully into melted Candy Melts.
Step 11: Decorate Your Pops
Sprinkle on your favorite decorations such as chopped candy, nuts, or colorful sprinkles to give them that spooky flair!
How to Serve Halloween Cake Pops
Serving Halloween Cake Pops is not only about the treats themselves but also about creating a fun and festive atmosphere. Here are some serving suggestions to delight your guests.
Spooky Display
- Use a decorative cake pop stand to showcase your Halloween Cake Pops. A spooky-themed stand will enhance the Halloween vibe.
Treat Bags
- Place individual cake pops in clear treat bags tied with orange or black ribbons. This makes for a great party favor for your guests to take home.
Themed Platters
- Arrange your cake pops on themed platters, such as those shaped like pumpkins or ghosts, to create an eye-catching centerpiece on your dessert table.
Pair with Drinks
- Serve your Halloween Cake Pops alongside fun drinks like pumpkin spice lattes or spooky punch. This adds a delightful touch to your Halloween festivities.
How to Perfect Halloween Cake Pops
Creating flawless Halloween Cake Pops involves a few simple techniques. Follow these tips for the best results.
-
Choose Quality Ingredients: Use high-quality cake mix and frosting for the best flavor and texture.
-
Properly Crumble Cake: Ensure that the cake is crumbled into fine pieces before adding frosting, this helps in forming smooth cake balls.
-
Chill Before Dipping: Always chill the cake balls before dipping them in melted Candy Melts. This prevents them from falling off the stick.
-
Control Candy Melt Temperature: Melt Candy Melts at low power in short intervals to avoid burning; this ensures a smooth coating.
-
Use Decorations Wisely: Be creative with toppings like edible glitter, sprinkles, or candy eyes for an extra spooky effect.
Best Side Dishes for Halloween Cake Pops
Pairing side dishes with your Halloween Cake Pops can elevate the entire experience. Here are some delightful options:
-
Witch’s Brew Soup: A creamy green soup that complements the spooky theme while being deliciously comforting.
-
Mummy Hot Dogs: Fun and easy-to-make hot dogs wrapped in crescent dough resembling mummies — perfect finger food.
-
Monster Veggie Platter: Create a colorful veggie platter with dips shaped like monster faces for healthy snacking.
-
Ghostly Cheese Sticks: String cheese cut into ghost shapes will add a playful touch to your spread.
-
Pumpkin Deviled Eggs: These egg halves dyed orange and piped with green garnish resemble little pumpkins, making them festive and tasty.
-
Frankenstein Fruit Cups: Assemble fruit cups decorated as Frankenstein using watermelon slices and chocolate chips for eyes, adding a fruity option that’s still fun!
Common Mistakes to Avoid
Avoiding common mistakes can enhance your Halloween Cake Pops experience. Here are some pitfalls to watch out for:
- Using cold ingredients: Always use room temperature eggs and water for a smoother batter. Cold ingredients can lead to uneven baking.
- Skipping the chilling step: Don’t rush the chilling process after forming cake balls. This step is crucial for firm pops that maintain their shape when dipped in chocolate.
- Overheating the Candy Melts: Be cautious when melting Candy Melts; overheating can ruin their texture. Use short intervals in the microwave and stir well.
- Not decorating immediately: After dipping your Halloween Cake Pops, add decorations right away. The coating hardens quickly, making it hard for toppings to stick.
- Ignoring storage conditions: Store your cake pops in a cool, dry place. Excess moisture can cause them to become soggy or melt.
Storage & Reheating Instructions
Refrigerator Storage
- Store Halloween Cake Pops in an airtight container.
- They will stay fresh for up to one week.
- Place parchment paper between layers if stacking.
Freezing Halloween Cake Pops
- Wrap each pop individually in plastic wrap before freezing.
- They can last up to three months in the freezer.
- Thaw them in the refrigerator before serving.
Reheating Halloween Cake Pops
- Oven: Preheat to 300°F. Place pops on a baking sheet for 5-10 minutes.
- Microwave: Heat in short bursts of 10 seconds until just warm; avoid overheating.
- Stovetop: Not recommended as it may alter the texture of the chocolate coating.
Frequently Asked Questions
Here are some common questions about Halloween Cake Pops:
How do I make Halloween Cake Pops?
You start by baking a cake, crumbling it, and mixing it with frosting. Form balls, chill them, dip in melted candy melts, and decorate!
Can I customize my Halloween Cake Pops?
Yes! You can use different cake flavors, colors of candy melts, and various toppings like nuts or edible glitter for unique designs.
How long do Halloween Cake Pops last?
When stored properly in an airtight container, they can last up to one week in the refrigerator or three months when frozen.
What are some fun decoration ideas?
Consider using candy eyes for monsters, orange sprinkles for pumpkins, or white chocolate drizzle for mummy wraps to enhance your spooky theme!
Final Thoughts
These Halloween Cake Pops are not only delightful but also versatile! You can customize them with different flavors and decorations for any party. Whether you’re hosting a gathering or enjoying a cozy night at home, these treats are sure to bring joy and excitement. Try making your own spooky creations this Halloween!
Halloween Cake Pops
Halloween Cake Pops are the ultimate festive treat, perfect for any Halloween gathering! These adorable, bite-sized cake pops can be transformed into spooky designs like pumpkins, mummies, and monsters, making them a hit with both kids and adults. With their rich flavor and creative presentations, they are sure to impress your guests. Plus, making them is a fun family activity that allows for endless customization. Whether you’re hosting a party or celebrating at home, these delightful treats will add a touch of sweetness to your spooky festivities!
- Prep Time: 20 minutes
- Cook Time: 40 minutes
- Total Time: 1 hour
- Yield: Approximately 24 cake pops 1x
- Category: Dessert
- Method: Baking
- Cuisine: American
Ingredients
- 1 box favorite cake mix
- 1 3.4 oz box instant pudding mix
- 4 eggs
- 1 cup water
- 1/3 cup vegetable oil
- 1 cup frosting
- Candy melts
- Toppings (sprinkles, candy eyes)
Instructions
- Preheat oven to 350°F. Grease a 13 x 9 inch baking pan.
- In a large bowl, mix cake mix, pudding mix, eggs, water, and vegetable oil until smooth. Pour into the prepared pan.
- Bake for 30-40 minutes until a toothpick comes out clean. Cool for 10 minutes.
- Crumble the cooled cake in a large bowl and mix in frosting until combined.
- Form small balls from the mixture and chill in the refrigerator for at least two hours.
- Melt candy melts in intervals until smooth; dip lollipop sticks into the melts before inserting into chilled cake balls.
- Dip each cake pop into melted candy and decorate immediately before it hardens.
Nutrition
- Serving Size: 1 serving
- Calories: 160
- Sugar: 15g
- Sodium: 50mg
- Fat: 7g
- Saturated Fat: 3g
- Unsaturated Fat: 4g
- Trans Fat: 0g
- Carbohydrates: 22g
- Fiber: <1g
- Protein: 2g
- Cholesterol: 40mg

